

Learning how to read a tape measure is much easier than it seems. Most people are intimidated by how confusing they look. In just a few minutes you will be able to read a tape measure with ease. Now let’s take a closer look at how the lines break down into simple-to-understand components.
We will be using some symbols during the course of this article. When you see a quote mark ,” this means inches. Another way to mention inches is also with the abbreviation, in. When talking about feet we use another type of quotation mark, ‘. The abbreviation ft may be used.
What are the lines on a tape measure?
Tape measures have a series of lines between the numbers. The different lengths indicate different levels of measurement.
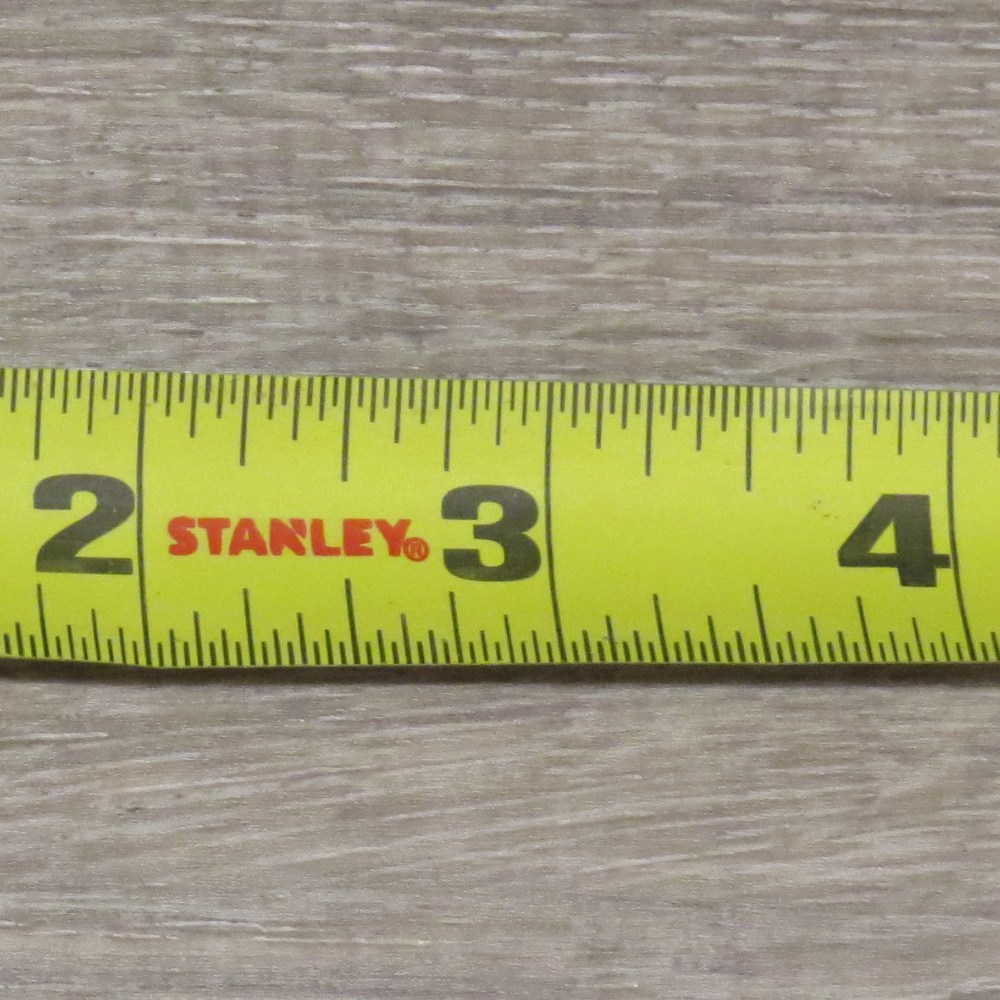
The longest lines tell us the length in inches. These lines go all the way across the tape and are going to have a number next to it.
The next longest line indicates the half inch (½”) mark. These are located directly between the inch increments. There is only one “half inch” point between each inch line.
The next longest lines will be the quarter inch (¼”) mark. These are mid-way between each half inch mark. There are two “quarter inch” marks between each inch line. There would be three but the half inch mark is the equivalent of two quarter inches.
The next lines are eight inch (⅛”) marks. These are mid-way between the quarter inch marks. On a tape measure there will be four of them between each inch line. This is because the quarter and half inches are also divisible by eight inches. A quarter inch is two eighths, and a half inch is four eighths.
The smaller lines between each eighth inch mark are sixteenths (1/16”) of an inch. They are between the eighth inch lines. There are eight of them between each inch line.
Some tape measures stop at the sixteenth inch lines, but some will go to thirty-seconds (1/32”) of an inch. There are thirty six of these between each inch line. The image above measures thirty seconds of an inch.
How do you read a tape measure?
When learning to read a tape measure, remember to start with the widest lines first. These are going to have numbers next to them, and represent inches.
Every twelve inches there will generally be an indicator of how many feet you are at. On this tape measure it is shown by a black arrow with “1 F” inside it. This says that at the twelve inch mark it is also the 1 foot mark.
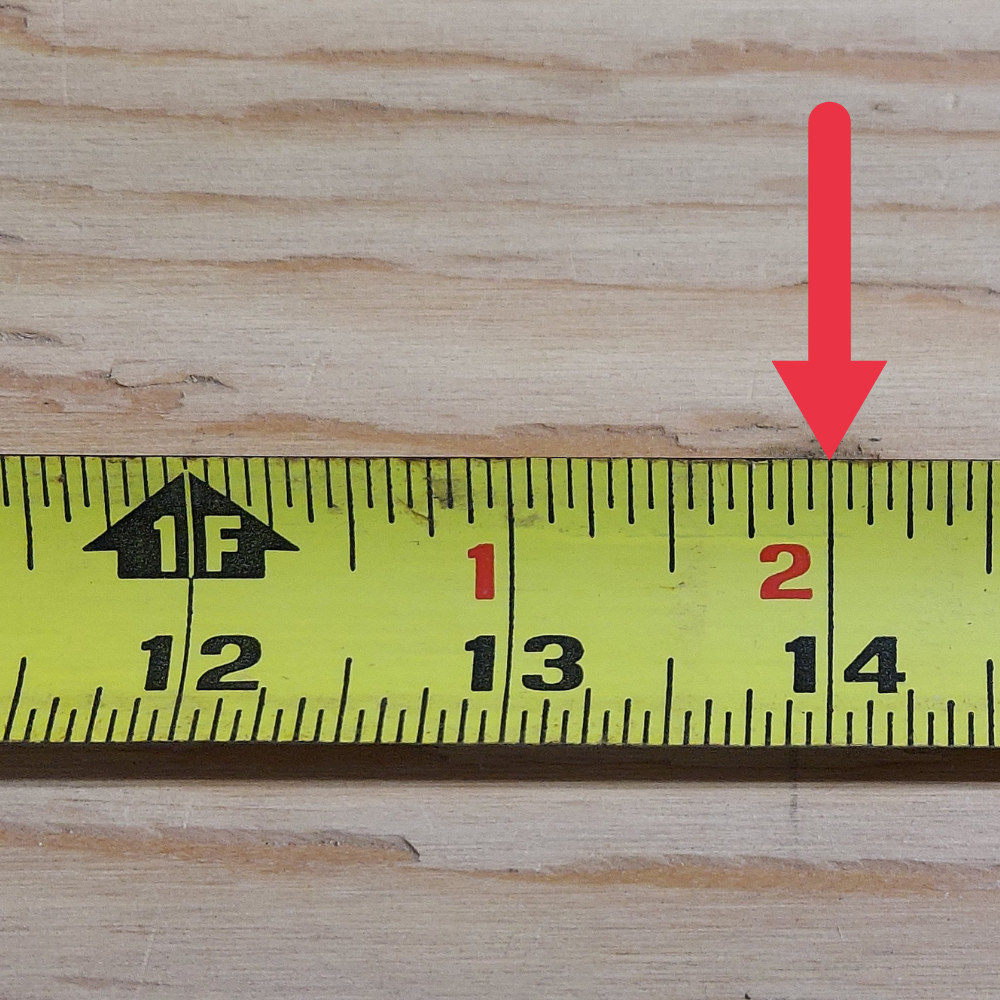
Notice in the above picture there are red numbers above some of the black numbers. These are also indicators of inches. The red arrow has a black number 14 and a red number 2 below it. The arrow is at the 14 in mark as well as the 1 ft 2 in mark.
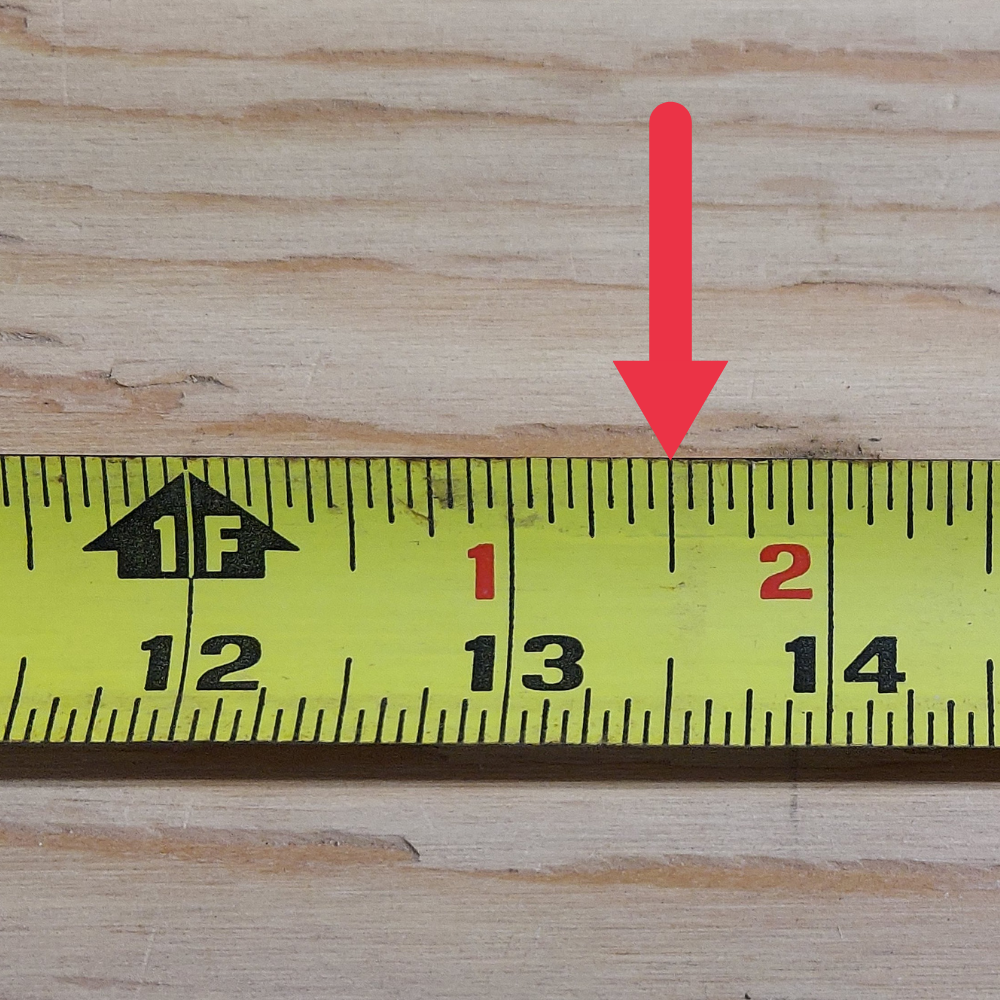
The above arrow is between the 13 and 14 inch lines. This can either be called 13-½” or 1 ft 1-½”.

Do you remember what mark is mid-way between the half and one inch marks? These are the quarter inch marks.
When we read a tape measure we are reading from lower to higher numbers. In this case it will be from left to right.
The picture above has the arrow at a ¼” mark, but since it’s past the ½” mark this makes it ¾”. This arrow is at the 13-¾” mark, also called 1’ 1-¾” (one foot, one and three quarters of an inch).
The Components of A Tape Measure:
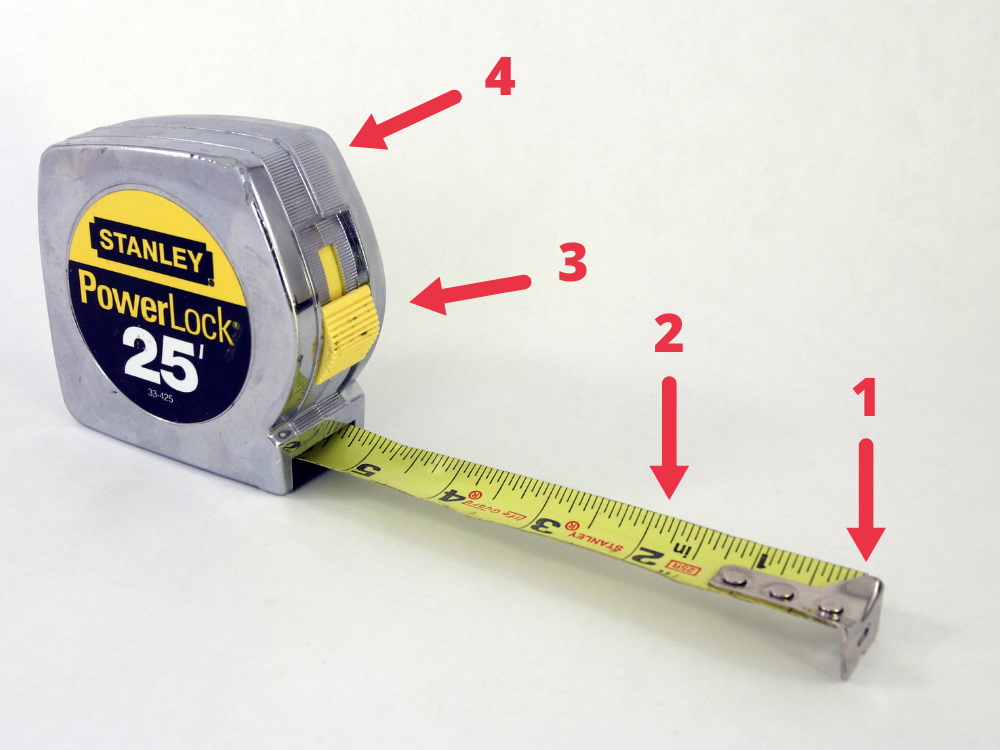
This picture shows the key components of the basic tape measure. As you can see there are not very many parts to be aware of, but we need each one to be able to use the tape.
- Hook/ Hook Slot: The hook is used to grab the ends of surfaces we are measuring. The hook slot is a small hole in the middle of the hook. It is used when there isn’t an edge to grab a hold of. A nail or screw can be used to hold the hook in place instead.
- Tape/ Blade: The blade is what extends when the case is pulled away from the hook. There are incremental measurements and strategic markings that are used to tell what the measurements are.
- Thumb Lock: The thumb lock is used to lock the case to the blade. This is useful when you need both hands to make a measurement, etc. When pushed downward it locks the blade in the spot you want it. This feature is best used when working on a flat surface, but can be used in many applications.
- Case: The case is what holds all the components together. There is a spring inside it that retracts the blade. The case is also where you will be holding the tape measure when in use.
- Belt Clip (not in image): On one of the sides of the tape measure is usually a belt clip. This is helpful for keeping it nearby in between uses.
How to Measure Something With A Tape Measure:
Using a tape measure is simple once it is understood. While holding it in one hand, grab the hook with the other. This is placed on one of the edges of what is being measured.
Pull the case until enough of the blade is extended a few inches past the other point being measured. Take a look at which line is closest to this point.
To get the measurement remember to work through the numbers from largest value to smallest. Starting with feet look for which value is between the hook’s end and the side you are observing.
After you know this value take a look at what the closest inch value is but still between the two ends being measured.
If your point falls on a measurement between two inches, figure out which one of the quarter inches is inside from it. If it goes lower to the eighth of an inch mark some math will need to be done.
Think back to algebra class where you learned about fractions. Convert the number of quarter inches into eighths of an inch. To do that multiply both the top and bottom by two.
¾” is equal to 6/8”. If there is another eighth of an inch past the ¾” mark, add the two top numbers.
¾” + ⅛” = 6/8” + ⅛” = ⅞”
Tape measures have what’s called a standout length. They are capable of extending out for a certain distance due to the curved shape of the blade. It will hold a shape for a given length until the weight of itself causes it to buckle.
This feature can be useful when the distance being measured is out of arm’s reach and there isn’t anybody to hold the end for you.
FAQ’s:
Why are the 16 inch marks red on a tape measure?
Some tape measures have a red box that covers all the numbers divisible by 16 inches. These are called the 16 on center points. This is used when framing a house to position the wall studs exactly 16 inches apart for hanging sheetrock.
Pro Tip: Let’s say you want to hang something heavy on a wall. If you are able to find a stud, use these red marks to find neighboring studs quickly.
What size tape measure should I get?
There are a wide array of sizes tape measures come in. The best one for the average homeowner is going to be a 16 ft model that measures in inches. There is also a version that has metric and US standard measurements.
Why does a tape measure’s hook move?
Tape measure hooks are designed to move about a sixteenth of an inch. This is because the hook can be used either hooking onto something, or pushing up against it. When these two things happen it’s important to get that measurement to start from the exact same point each time. Otherwise the measurements would come out wrong.