
Not knowing how to install cabinets can seem like a daunting task. Fortunately you don’t need to spend a ton of money on a highly paid professional. There are a handful of points you need to know before getting the job done on your own. Now let’s look at exactly what you need to be able to install your cabinets on your own!

There are a few main steps to take that will help your cabinet installation go smoothly. The first step is to get all your tools ready before you start. Next get your cabinets lined up in order, starting from the corner. Finding the studs and marking them on the wall will save a lot of time. Install the lower cabinets before you install the uppers.
Key Terms:
Pilot Hole– A hole that is drilled before installing a screw. Used to ensure the correct placement of the screw. Also helps to prevent the wood from splitting.
Flush- When the edges of the cabinet line up next to each other.
Hole Saw- A drill bit that bores circular holes. They can be in various sizes from as small as about half an inch, up to several inches wide. The hole saws remove a circular plug of the material when finished. These are cleaner than spade bits.
Spade Bit- Similar to a hole saw, the spade bit will make a circular hole. These chip away at the material, leaving a lot of sawdust behind.
Shims- Wedge shape pieces that are used to make cabinets level.
Ledger Board- Horizontal wooden board used to get the cabinets lined up straight.
Kitchen Cabinet Installation Tools
The tools required to install kitchen cabinets are some that most homeowners have already. You don’t need to buy the most expensive tools either. As long as they are reliable you can use them to install cabinets.
Getting them together and in one place before you start will help a lot. It will allow you to take an inventory before you begin, giving you a chance to run to the hardware store and pick up what you need. It will also let you put them in one place, getting them organized and ready for the job at hand.
Cabinet Installation Tools:
- Electric drill
- Drill bit set
- Countersink bit
- Hole saws or spade bits
- Various screws
- Tape measure
- Stud finder
- Pencil
- Level
- Clamps
- Ladder
- Shims
- Mallet
You may not need all of these tools for every cabinet installation. This list was meant to be all-inclusive, equipping you for almost any situation.
There are times when installing cabinets and you run into rare situations that require a specialty tool you wouldn’t use too often.
There was one install that I needed to run a water line through the crawlspace for the fridge. This required an extension for my drill bit so I could drill through a 4 in gap below the cabinet. I don’t use this extender very often, but now I have it for the situation I might need it in later.
Kitchen Cabinet Installation Instructions
Installing cabinets in a kitchen can seem like one of the most daunting tasks. There are usually more cabinets that are different sizes. This can feel overwhelming to anybody. Follow a few installation instructions to make it easier on yourself when installing kitchen cabinets.
- Install all the base cabinets first
- Start in corner and work your way out
- Drill holes a half inch larger than plumbing or electrical
- Leave the appropriate size gap between cabinets for appliances
- Nail a ledger board at the appropriate height for upper cabinets
- Start in corner and work your way out for uppers
- Adjust cabinet doors after all cabinets are installed
How to Install Base Cabinets
Step 1:
Get all the tools ready for the job. I like to keep them in tool boxes or bags so I know exactly where they are when I need them. Some people will go one step further and use a tool belt. These are helpful if you are used to them, but can be awkward and bulky if you don’t normally wear them.

Step 2:
Get the cabinets organized and in order of how they are going to be installed. This includes separating the lowers from the upper cabinets. You may not have enough room to lay them out, but take an inventory of the cabinets, and try to arrange them the best you can. Getting them in order will help you install them more smoothly, and make sure you are not missing anything.
If you went through a cabinet shop they should have included a schematic with the cabinets. This will indicate the locations of specific cabinets and how they are arranged. The cabinets would be labeled in some way, indicating where they go.
Step 3:
Pick a corner and start looking for studs. You will be installing the cabinets starting in a corner and working your way in either direction. You will also be installing the lower cabinets before the uppers. This will make it easier on you for several reasons. We will talk about these reasons later.
Find the studs and mark them on the wall. It’s best to do this lower on the wall so the cabinets will hide your marks when they are installed. For a complete overview on how to find wall studs check out my video below.

Step 4:
Once you know where the studs are, measure from the corner of the wall to the first stud. Then make a mark on the back of the cabinet, going in the direction you are measuring from. Keep in mind if you are measuring on the wall from right to left, then when you are looking at the back of the cabinet you will be measuring from left to right.
If the cabinet is wide enough to fall on more than one stud, put another hole where the second stud should be. You will want to screw into each stud on the wall. This will make the bank of cabinets the most secure in the long run.
Step 5:
Drill a pilot hole in the back of the cabinet at the mark. Use a drill bit that matches the thickness of the shaft of the screw, but not the threads. This hole should als be in the middle of the nailer. Too high and it will be hard to get your drill straight into the cabinet.

Step 6:
Get a 3 IN Cabinet Screw started inside the cabinet. The screw should be drilled in just enough to where the tip is not sticking out the back of the cabinet. This will make it easy to adjust the cabinet into place before screwing it down.
Step 7:
Hold the cabinet into position firmly while screwing it into place. This would be easier if you have someone else to help you. The screw should land on the stud securely. If the head just keeps spinning, pull the cabinet off the wall and find how far the hole needs to be moved. Drill a new hole and move the screw to this hole.
Step 8:
Repeat steps 4-7 for each cabinet. Once you are done installing all the lower cabinets in one direction, continue in the other direction. Finish installing all the lower cabinets before you move to the upper cabinets.
Step 9:
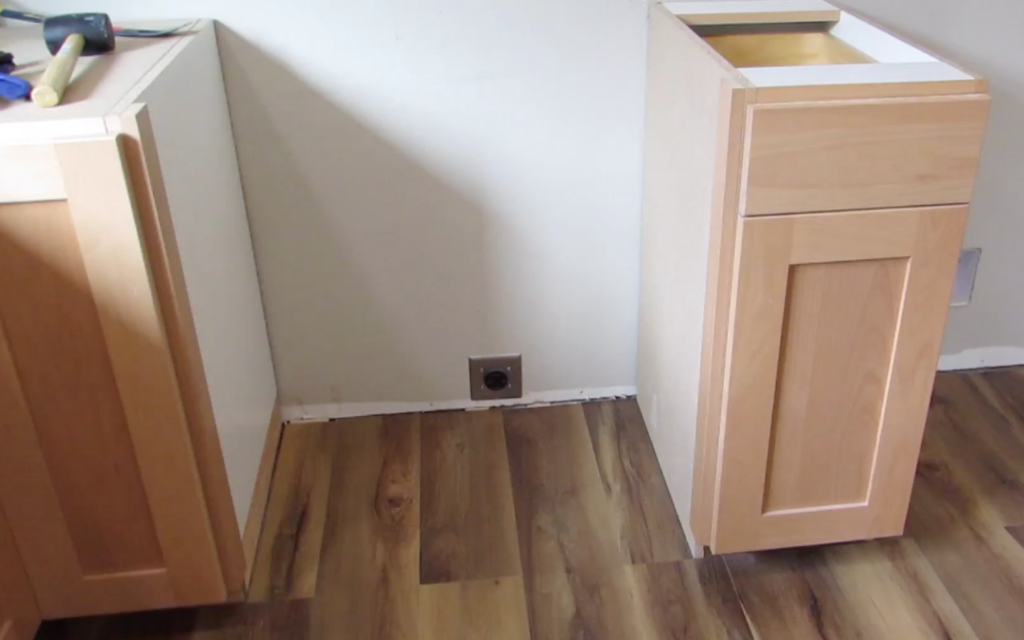
There might be gaps between the cabinets where certain appliances will be. The schematic should show how wide the gap is between the cabinets. If you have the appliances already you can measure the face of them. This will be the widest part, and your gap can be about a quarter inch wider than this.
Do some math to find where the next cabinet falls on the stud. Take the distance from the edge of the last cabinet installed to the stud that the next cabinet will be on. Subtract the width of the space for the appliance. This new number will tell you how far from the edge of the cabinet to drill the pilot hole.
Step 10:
Lay a level across the tops of the cabinets. If any need adjustment back out the screw slightly, without removing it from the stud. Tighten a clamp between the two cabinets. You may need to remove the cabinet doors to do this.
Use a mallet and shims to get the cabinets flush in the front and level on the top. Screw them together and fasten the screws in the wall studs.

How to Install Wall Cabinets
Once the base cabinets are installed it’s time to get started on the wall cabinets. The steps for doing this is similar to installing base cabinets. The biggest difference is being able to hold the cabinets in the right place to install them.
It is ideal to have a helper or two to hold them up while you screw them in. If you don’t have a helper, make a jig or use a box the correct size. To find out this size see FAQ’s below.

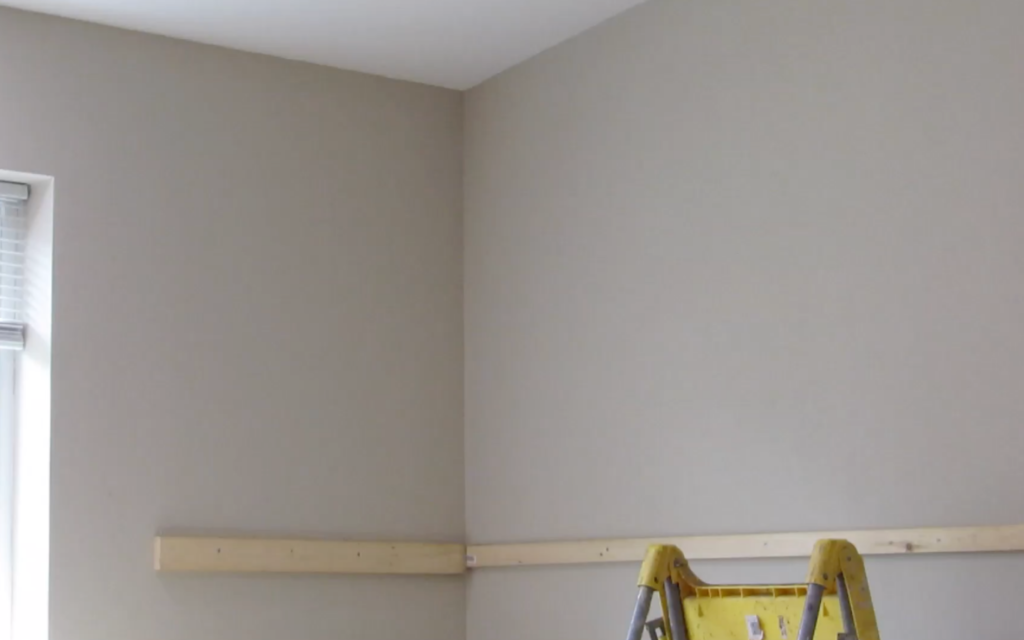
The process for installing upper cabinets is very similar to lower cabinets. Start in the corner and work your way outwards. Placing a ledger board on the wall will ensure each cabinet is at the ideal height.
It can be helpful to clamp the cabinet to the previously installed cabinet while it’s in place. This can act as an extra set of hands. While it’s clamped you will want to use the mallet to tap it into place and line the faces up together.
Find the studs and drill pilot holes on each cabinet as you install them. This will be the easiest way to hang them, especially if you don’t have an extra helper with you.
How to Hang Upper Cabinets By Yourself
Hanging upper cabinets is possible to do by yourself. Not having an extra helper can prove challenging, but not impossible.
The first thing to do is find out exactly how far from the top of the lowers the bottom of the uppers should be. This is the location you want to hang your ledger board.
Next make a simple box with pieces of plywood. The box should be the exact height you want the uppers to sit. It’s best for the box to have a piece of wood on the top and bottom. You don’t need it to have wood on all four sides, just two opposite sides.
If you have L-brackets you should use them to reinforce the sides. You DO NOT want the walls to shift, turning the box into a parallelogram. This will change the height of the uppers.
This is going to be your extra set of hands to hold up the uppers while you do the work. Move it as you go, placing it below the cabinet you are working on at the time.
FAQ’s
Can cabinets be installed on concrete floors?
Yes. Cabinets can be installed directly on concrete floors. It’s better for several reasons to have the flooring put in before installation. Make sure each cabinet is secured to the studs and to adjacent cabinets. This will ensure the most strength without the need of securing the cabinets to the floor.
How high should I hang my upper cabinets?
The ideal distance for uppers is 18 in from the top of the countertop to the bottom of the upper. When installing uppers take into account the thickness of the countertop you will be installing. Some counters require an underlayment to adhere them to. This will be a piece of plywood that is typically either ⅝” or ¾”. From the top of the lower cabinets to the bottom of the upper cabinets should be 18” + (thickness of countertop) + (thickness of underlayment if being used).
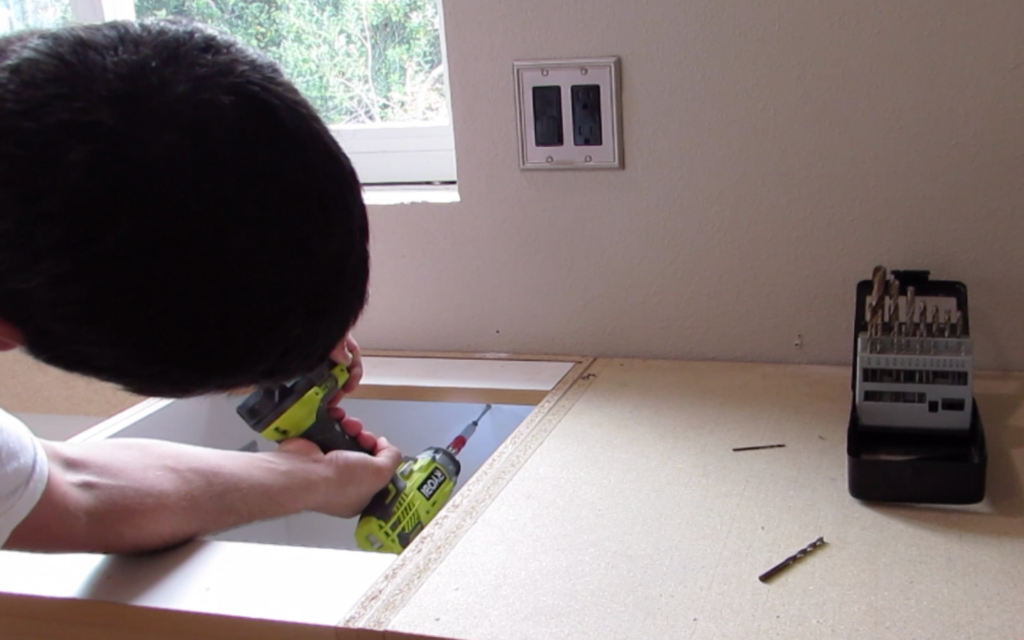
How do I prepare cabinets for plumbing or electrical?
For cabinets that have plumbing or electrical use the appropriate hole saw or spade bit. Measure from edge of next cabinet to first hole. Mark a vertical line at this spot. Do the same for a measurement from the ground. This will give you an intersecting point that the hole will be drilled.